GitHub
GitHub Connector
Indexes repository content including source code, markdown, issues, and pull requests.
Prerequisites - Before you start, make sure you have:
- A running Sercha instance (Quickstart or Development Setup)
- A GitHub account with permission to create OAuth Apps
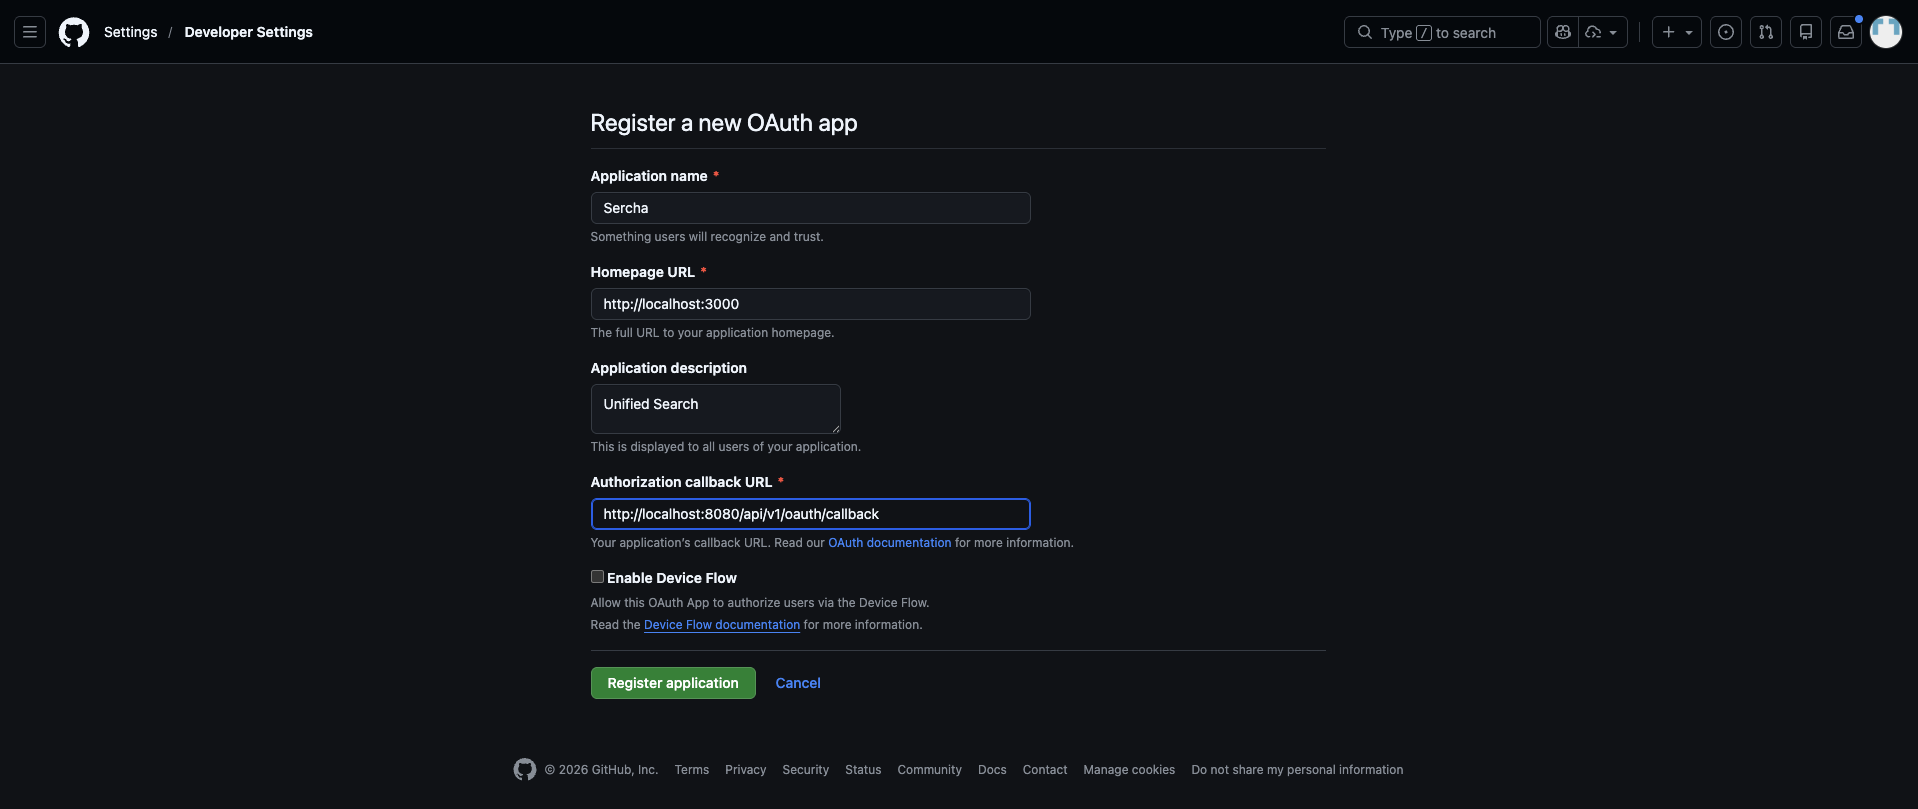
1. Create a GitHub OAuth App
Go to Register a new OAuth application on GitHub and fill in the form:
| Field | Value |
|---|---|
| Application name | Sercha (or any name you like) |
| Homepage URL | http://localhost:3000 |
| Application description | Optional - e.g. Unified Search |
| Authorization callback URL | http://localhost:8080/api/v1/oauth/callback |
Leave Enable Device Flow unchecked, then click Register application.
For more details on GitHub OAuth Apps, see the GitHub documentation on creating an OAuth App.
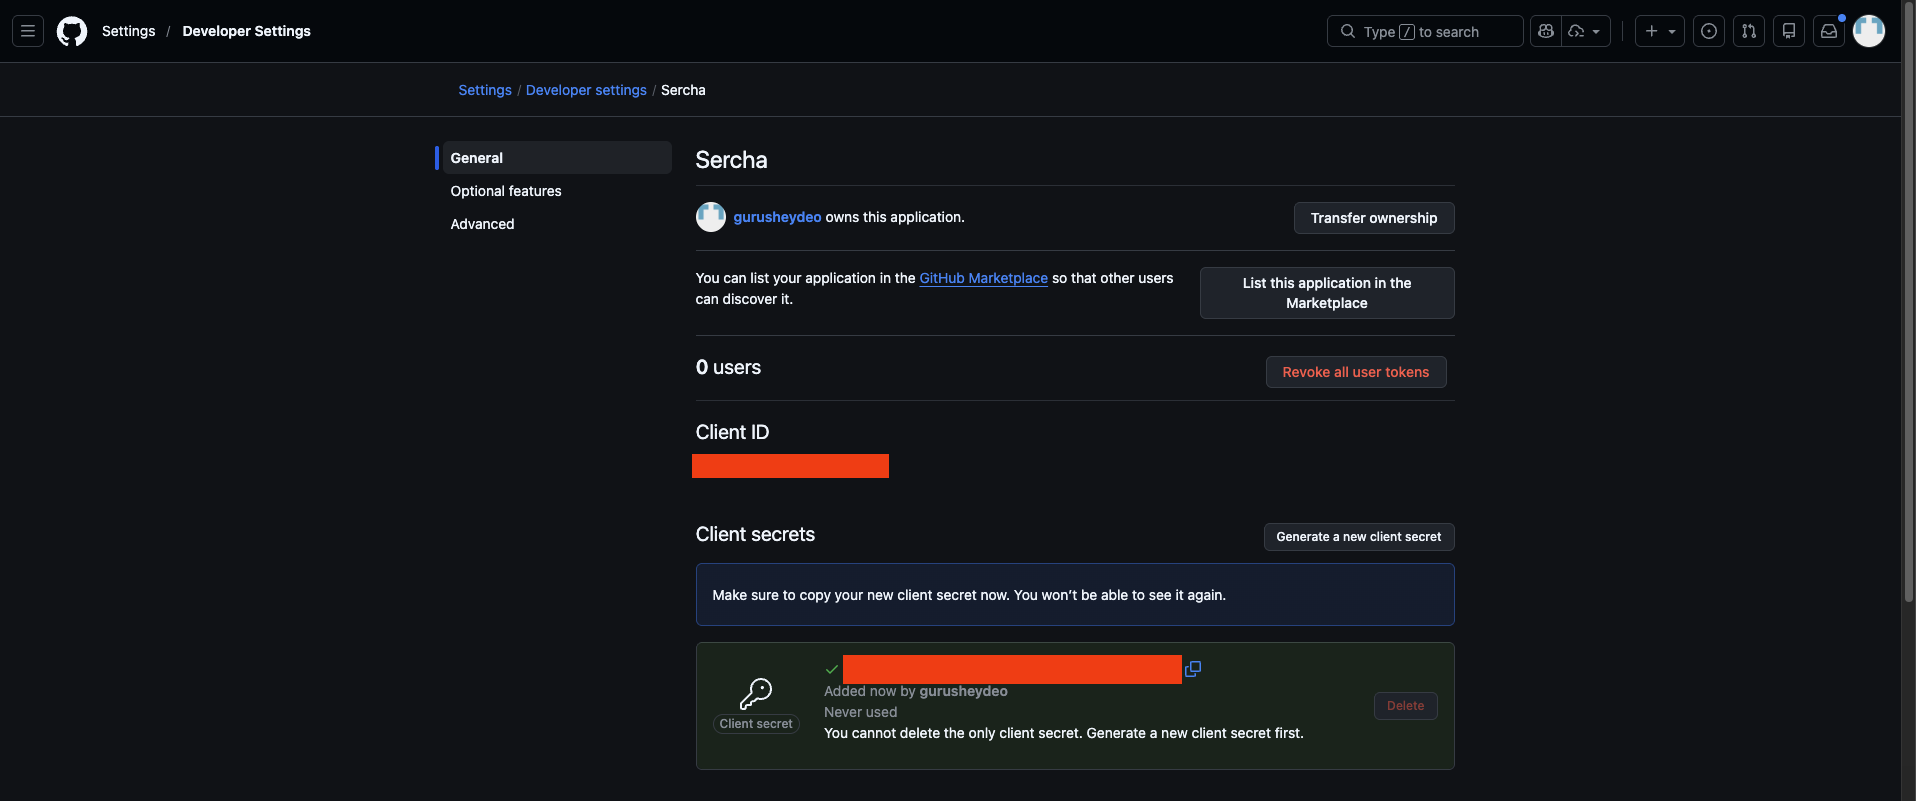
2. Copy the Client ID and generate a Client Secret
After registering, GitHub takes you to the app settings page. From here:
- Copy the Client ID shown on the page
- Click Generate a new client secret
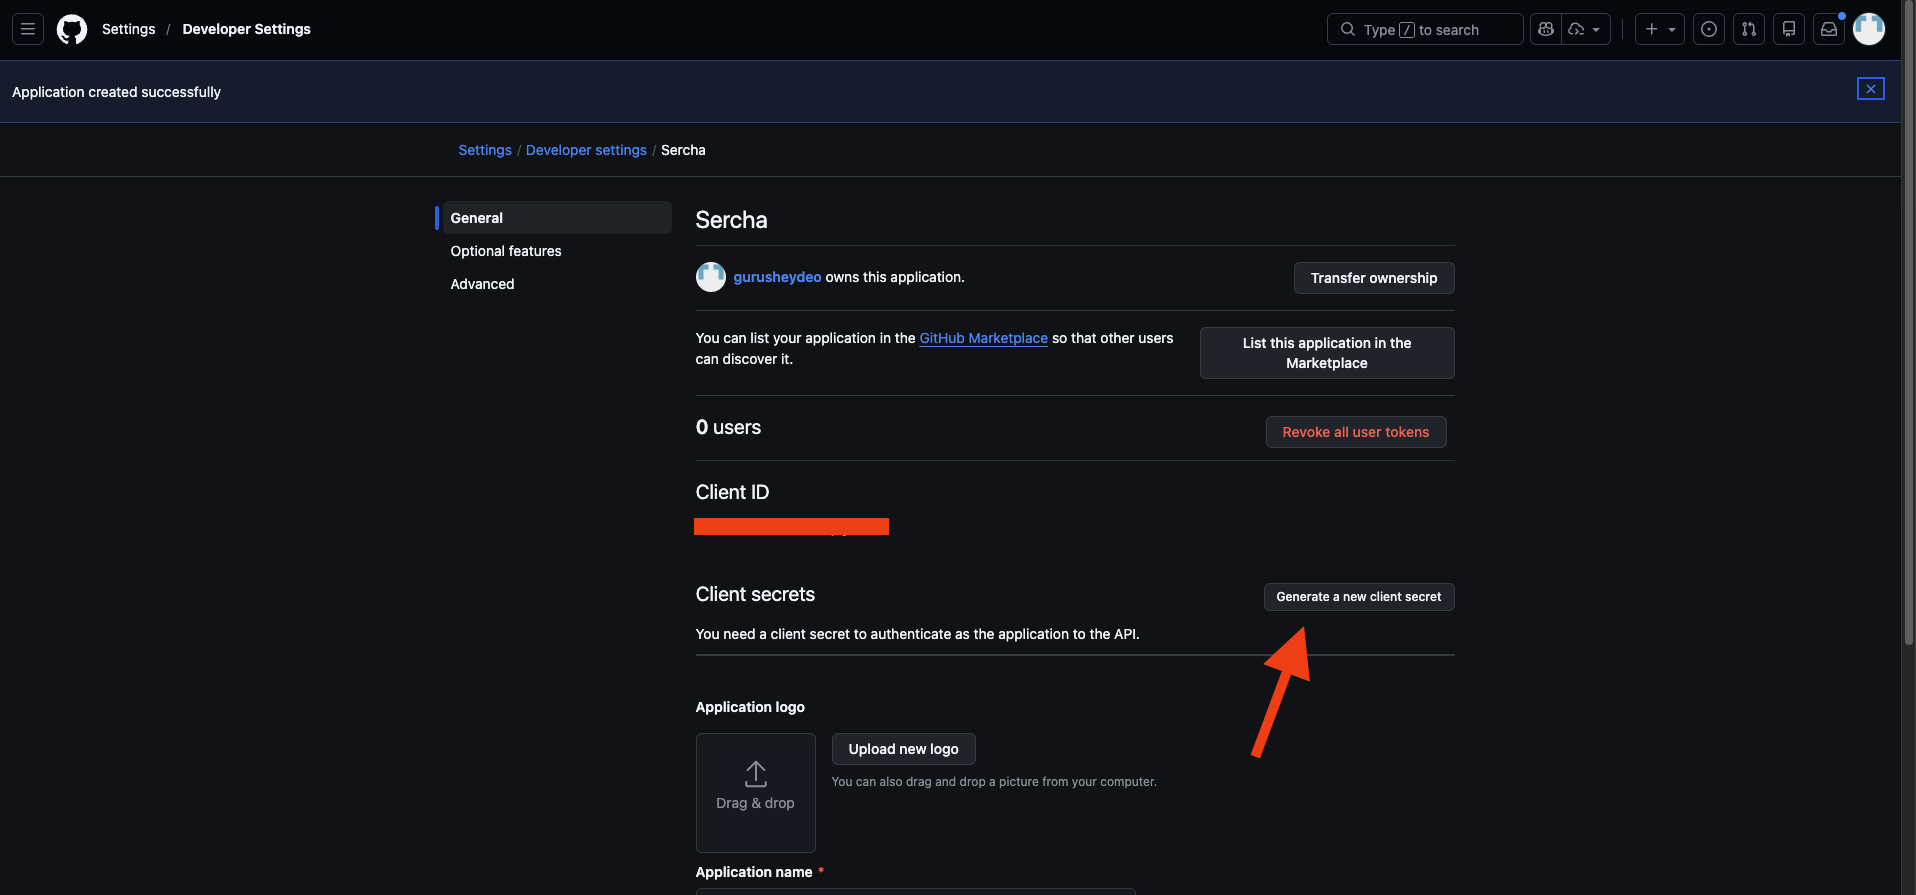
- Copy the client secret immediately - GitHub only shows it once
Copy the secret now. GitHub will not show it again. If you lose it, you'll need to generate a new one.
3. Configure the provider
Add the credentials to your .env file (in your Sercha deployment directory):
GITHUB_CLIENT_ID=your_client_id
GITHUB_CLIENT_SECRET=your_client_secret
4. Restart the backend
Restart the backend container so it picks up the new credentials:
docker compose restart sercha-core
No data is lost when restarting. The backend containers are stateless - all data is persisted in PostgreSQL and OpenSearch.
You can verify the provider is configured via List Providers:
curl http://localhost:8080/api/v1/providers \
  -H "Authorization: Bearer $TOKEN"
GitHub should show "configured": true, "enabled": true.
From here you can continue setup using either the Admin UI or the API.
- Admin UI
- API
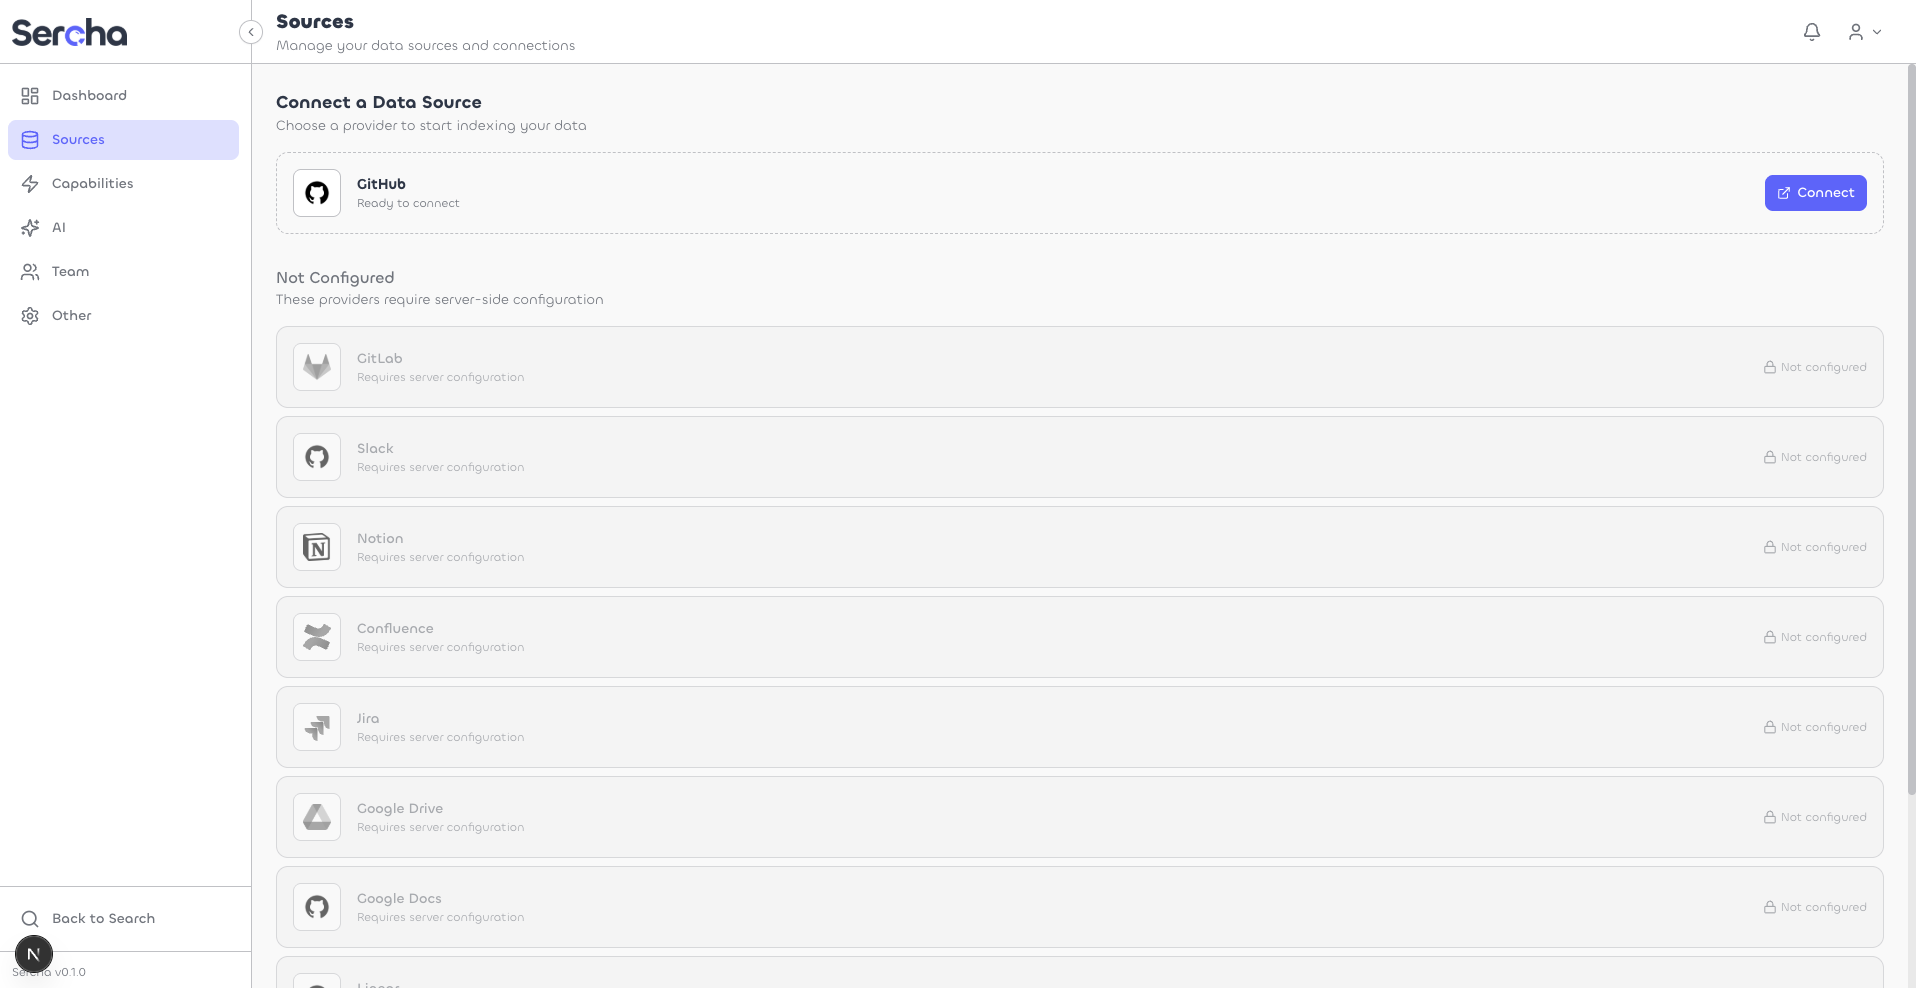
5. Connect your GitHub account
Open http://localhost:3000/admin/sources in your browser. You'll see GitHub listed under the available providers. Click Connect on the GitHub row.
Your browser redirects to the GitHub consent page. Review the permissions and click Authorize.
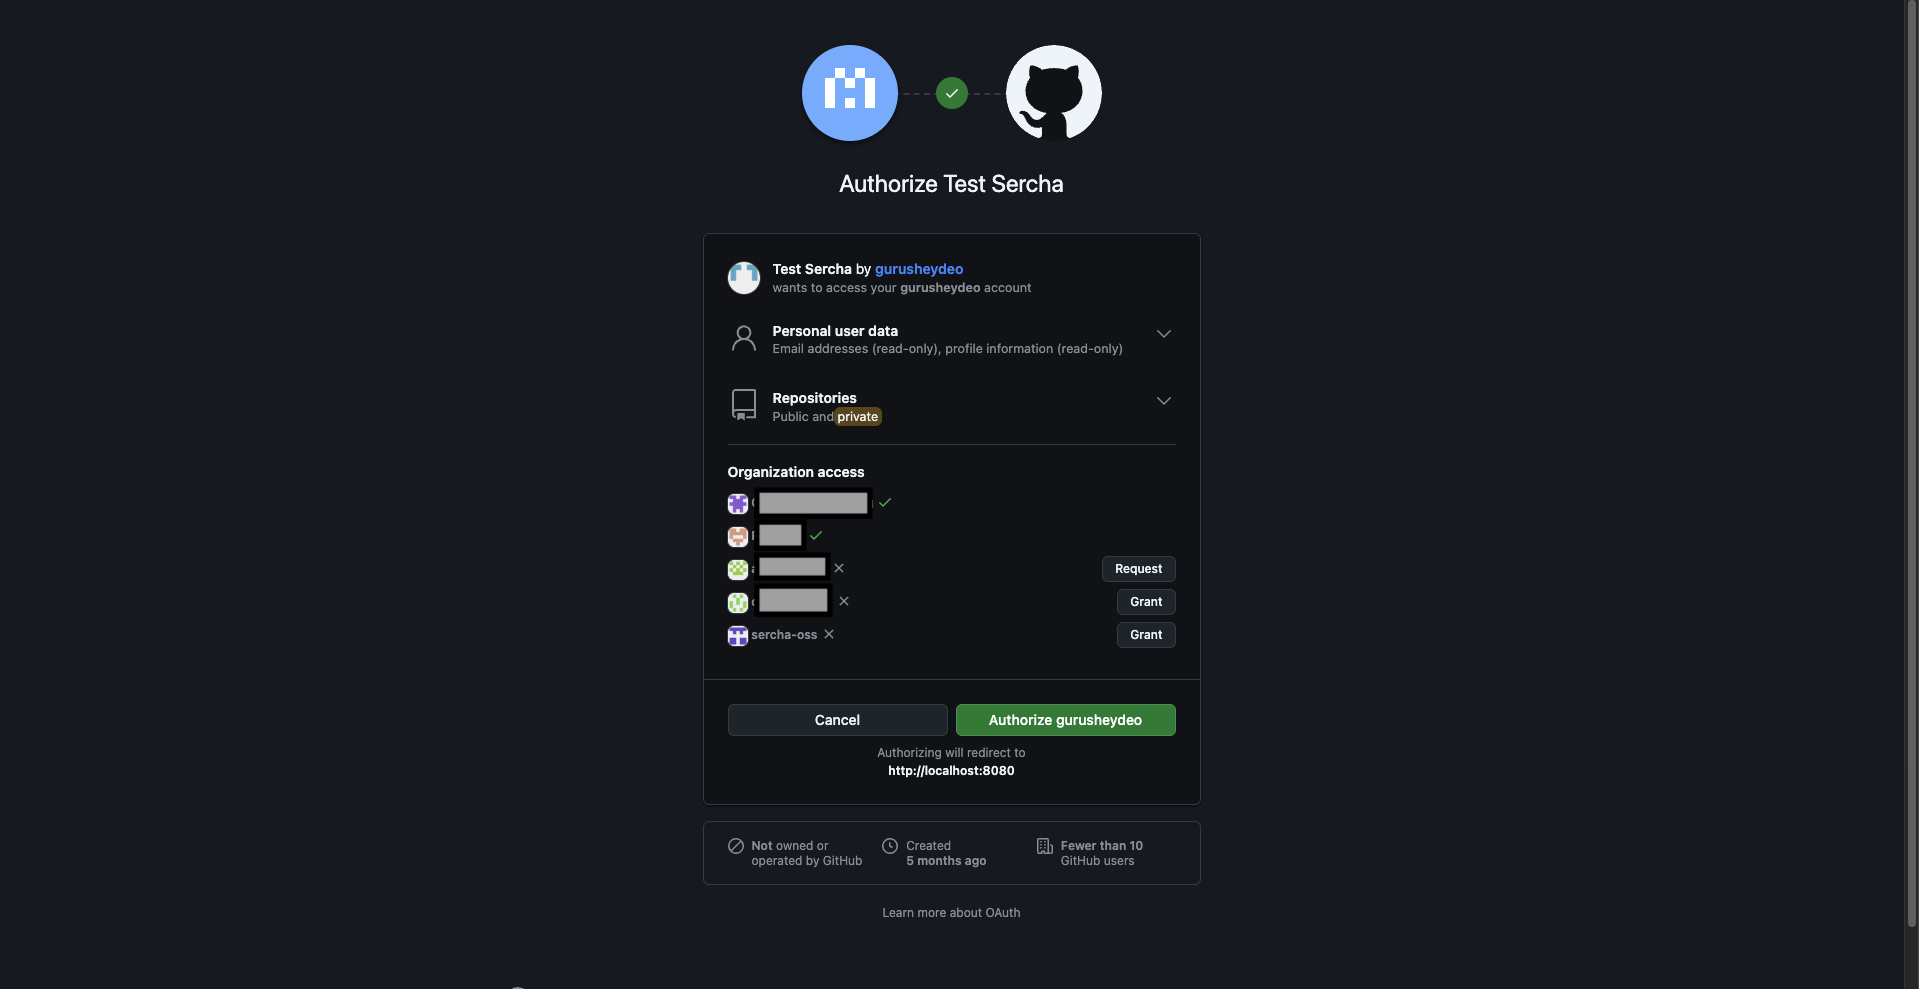
If you belong to any GitHub organizations, this page lets you Grant access to them. You'll only be able to index repositories from organizations you authorize here. You can update this later from your GitHub Authorized OAuth Apps settings.
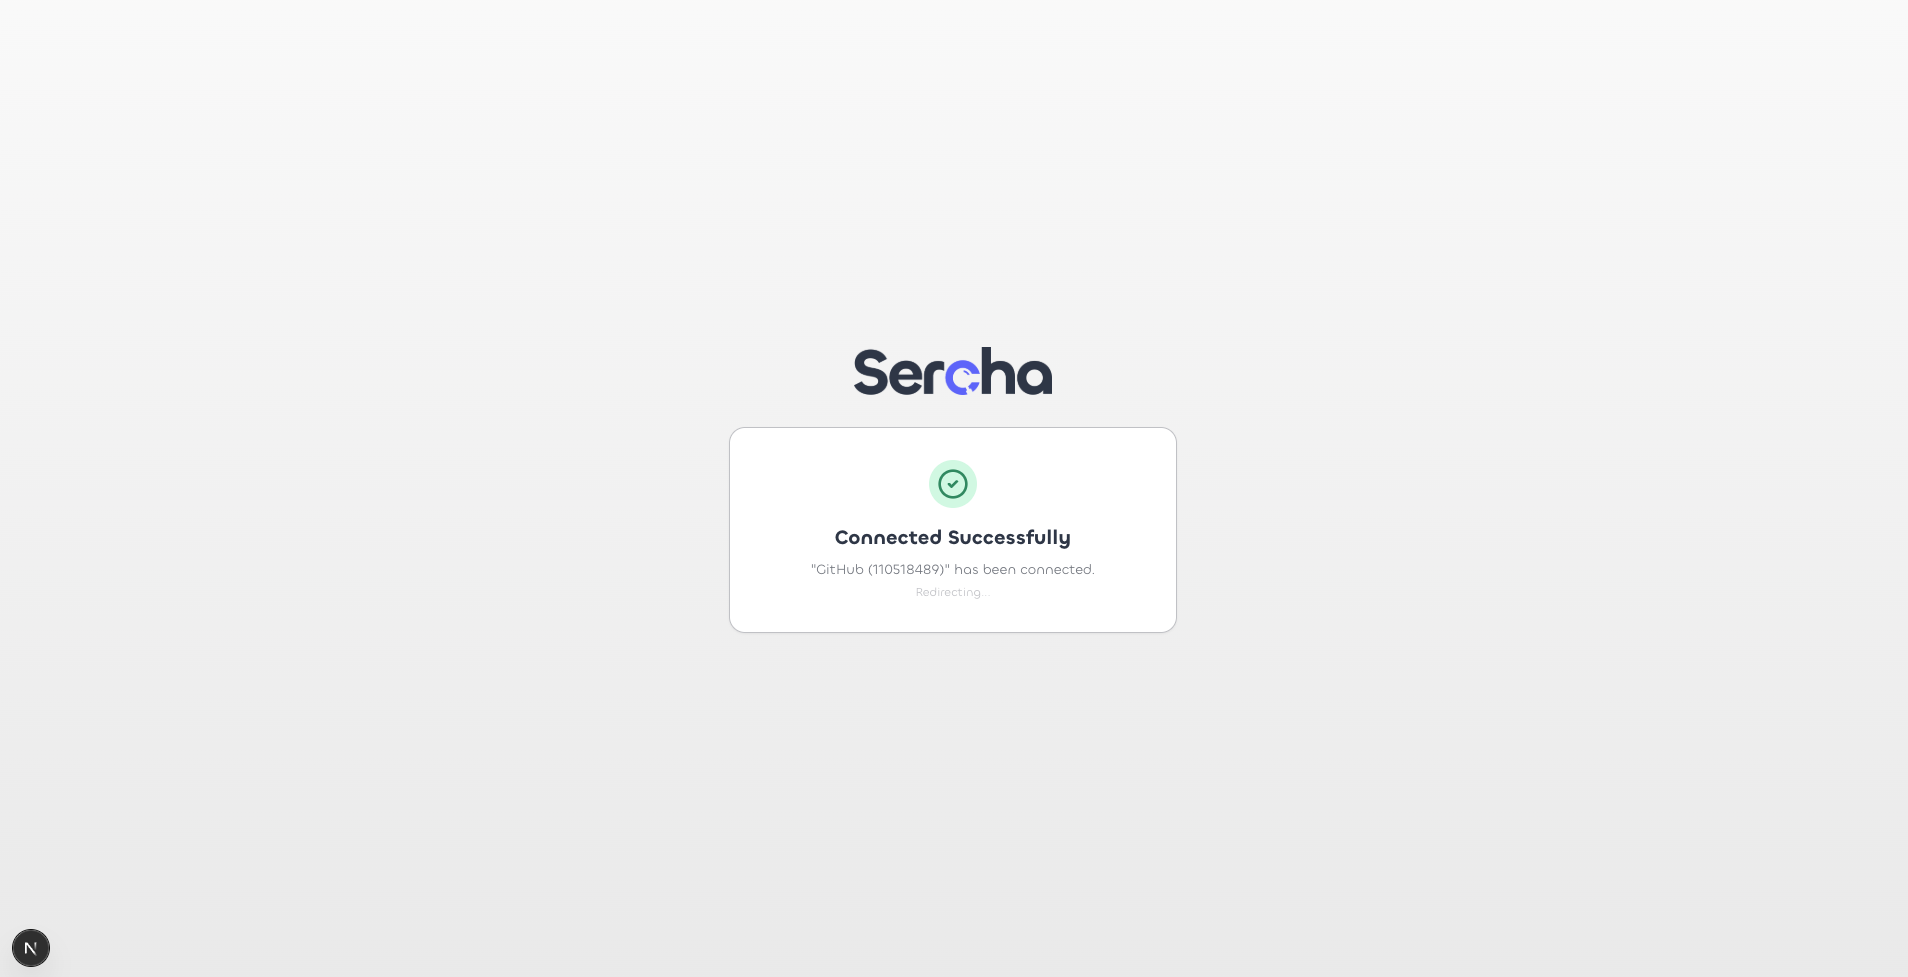
After authorizing, you'll be redirected back to Sercha with a success confirmation.
6. Select repositories and create a source
Choose which repositories to index. Use the search bar to find specific repos, or click Select All. Then click Create Source.
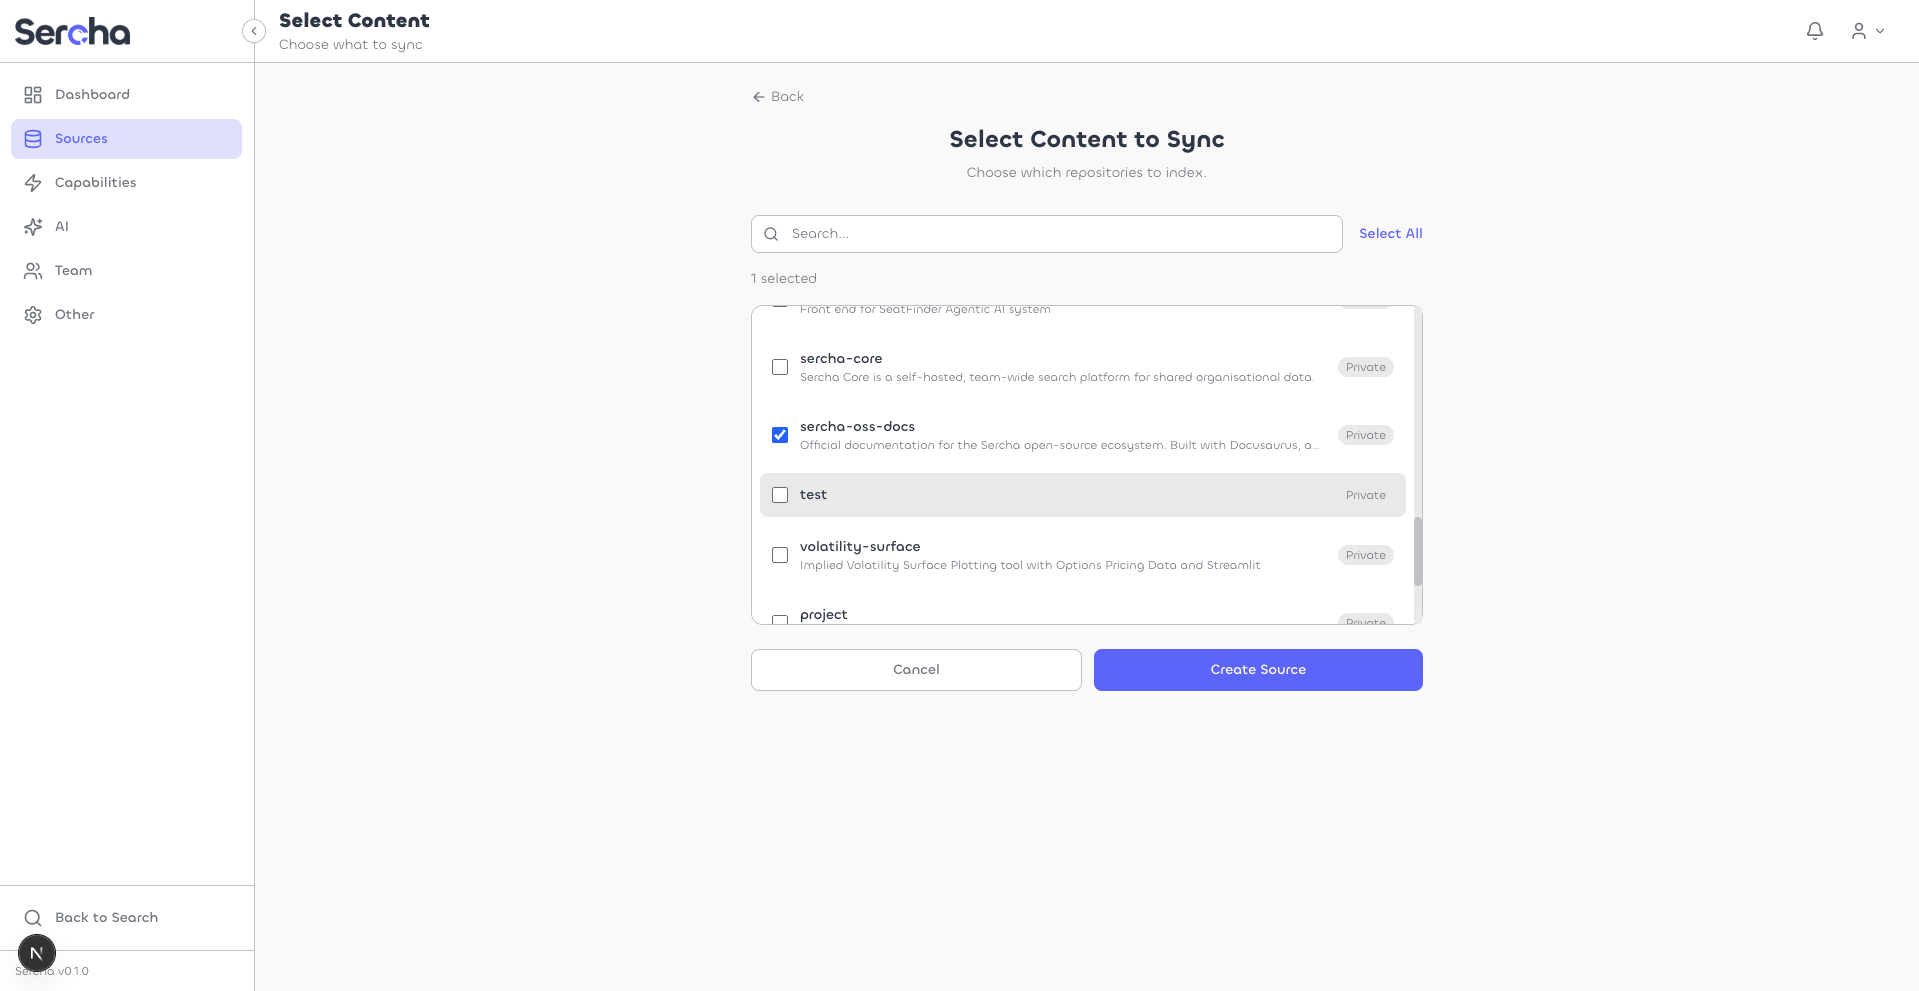
Your new source appears on the Sources page.
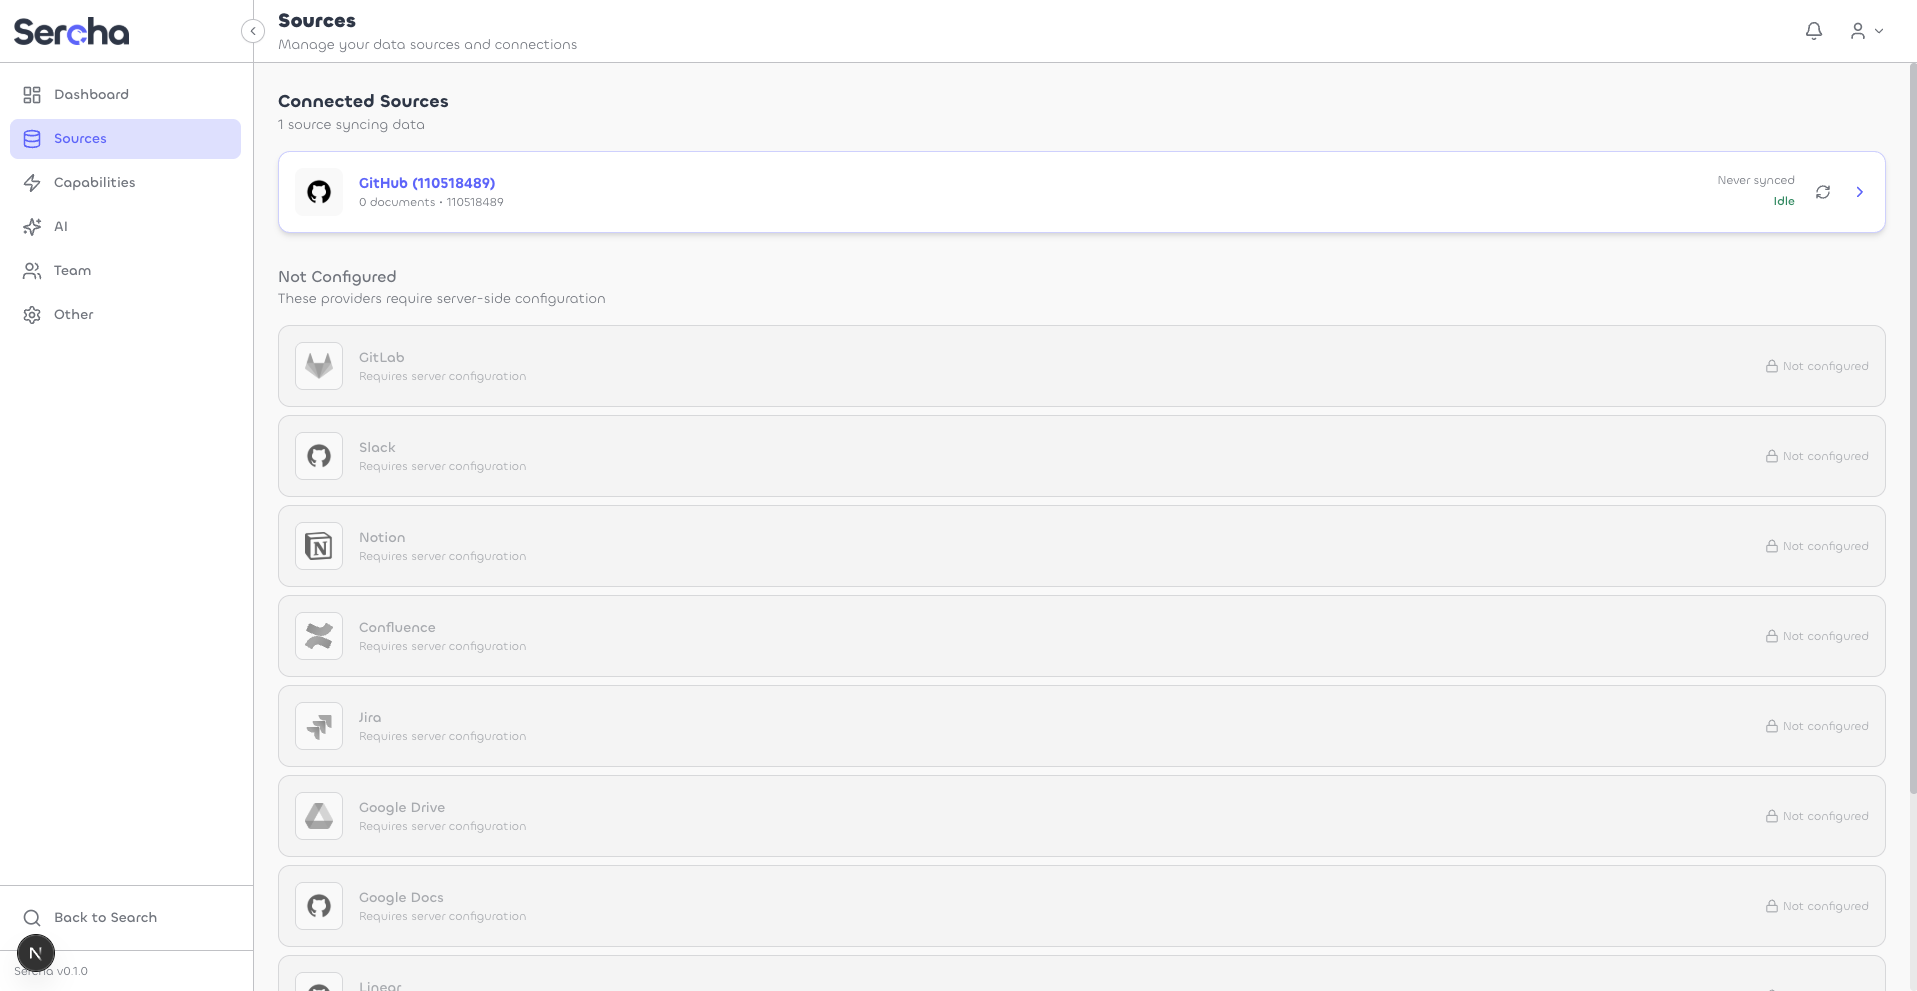
7. Trigger a sync
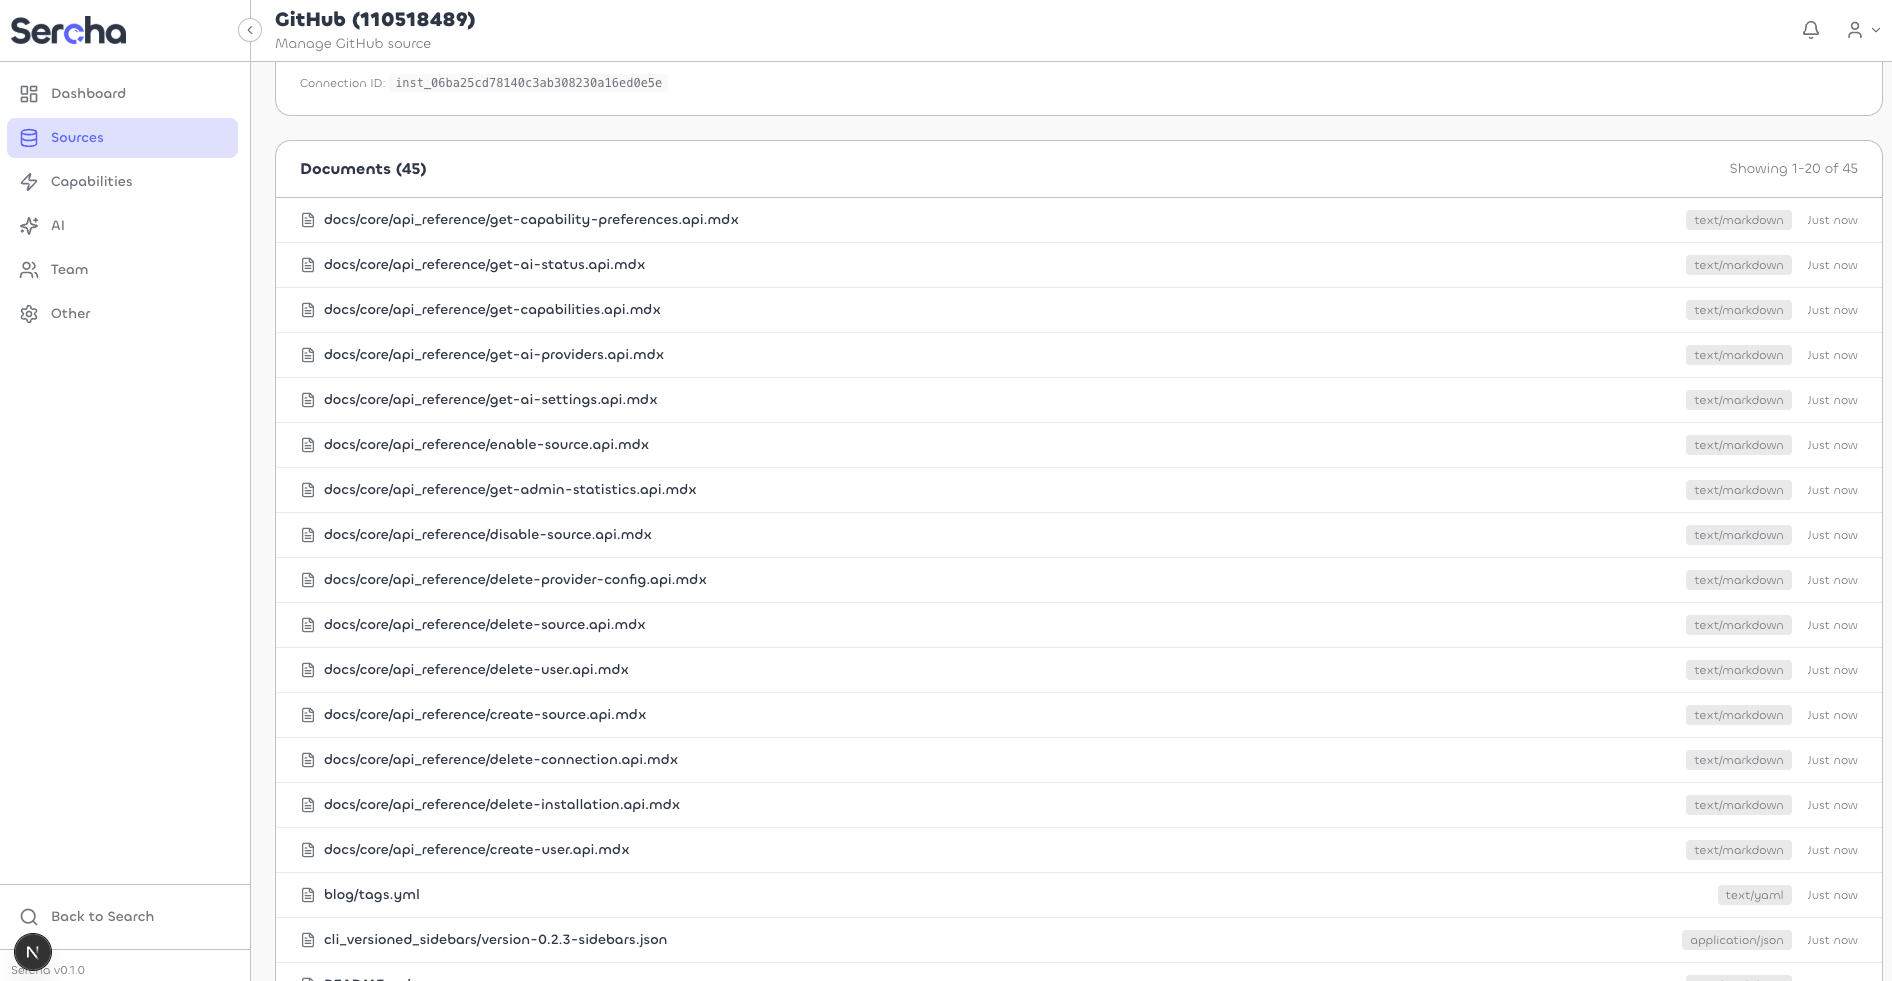
Click into your source, then click Sync Now to start indexing.
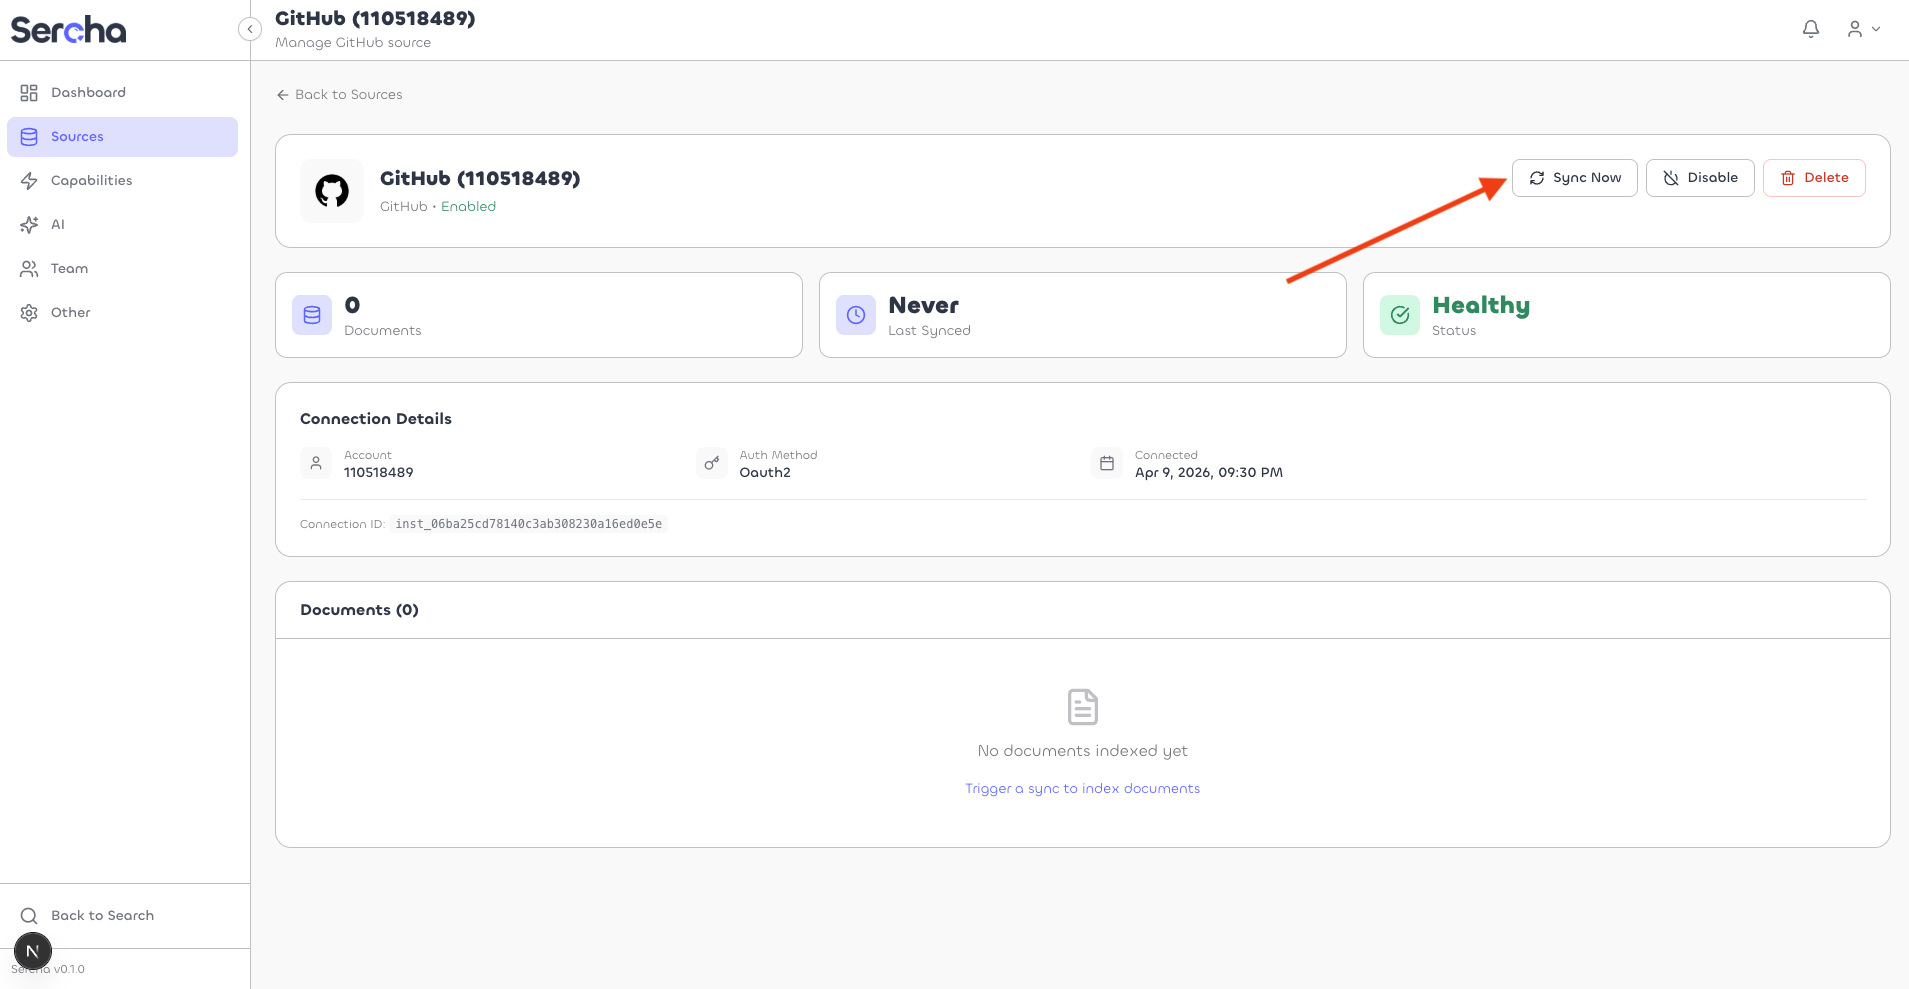
Once the sync completes, you'll see the indexed documents listed on the page.
5. Get an auth token
If you haven't set up an account yet, create one via Initial Setup:
curl -X POST http://localhost:8080/api/v1/setup \
  -H "Content-Type: application/json" \
  -d '{
    "email": "admin@example.com",
    "password": "your-password",
    "name": "Admin"
  }'
Then log in to get a Bearer token:
curl -X POST http://localhost:8080/api/v1/auth/login \
  -H "Content-Type: application/json" \
  -d '{
    "email": "admin@example.com",
    "password": "your-password"
  }'
Export the token from the response:
export TOKEN=<paste token here>
6. Connect your GitHub account
Start the OAuth flow via Authorize:
curl -X POST http://localhost:8080/api/v1/oauth/github/authorize \
  -H "Authorization: Bearer $TOKEN"
Open the returned authorization_url in your browser. GitHub shows the consent page - review the permissions and click Authorize.
If you belong to any GitHub organizations, this page lets you Grant access to them. You'll only be able to index repositories from organizations you authorize here. You can update this later from your GitHub Authorized OAuth Apps settings.
After authorization, GitHub redirects to localhost:8080/api/v1/oauth/callback. The API processes the code exchange and creates a connection. The browser then redirects to the UI - if the UI isn't running, that's fine, the connection is already created server-side.
Verify the connection via List Connections:
curl http://localhost:8080/api/v1/connections \
  -H "Authorization: Bearer $TOKEN"
Save the connection id from the response.
7. Create a source
List available repositories for the connection:
curl http://localhost:8080/api/v1/connections/{connection_id}/containers \
  -H "Authorization: Bearer $TOKEN"
Each container represents a repository. Create a source with the repositories you want to index:
curl -X POST http://localhost:8080/api/v1/sources \
  -H "Authorization: Bearer $TOKEN" \
  -H "Content-Type: application/json" \
  -d '{
    "name": "My GitHub Repos",
    "provider_type": "github",
    "connection_id": "{connection_id}",
    "containers": [
      {"id": "owner/repo-name", "name": "repo-name", "type": "repository"}
    ]
  }'
8. Trigger a sync
Trigger a sync to start indexing:
curl -X POST http://localhost:8080/api/v1/sources/{source_id}/sync \
  -H "Authorization: Bearer $TOKEN"
Check sync progress via Sync State:
curl http://localhost:8080/api/v1/sources/{source_id}/sync \
  -H "Authorization: Bearer $TOKEN"
What gets indexed
Scopes
The GitHub OAuth App requests repo, read:user, and user:email scopes.
Sync behavior
- Initial sync: Fetches all files from selected repositories
- Incremental sync: Detects changes since last sync using commit timestamps
- Schedule: Automatic sync runs periodically (configurable)